|
These
pictures and instructions are based on a UK MK2 Chopper
|
 |
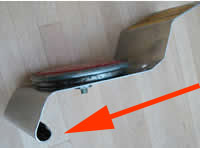
This
is what it looks like to start with.
If your Chopper is in reasonable condition you should be able
to remove the seat assembly and sissy bars together.
Start by loosening the seat pillar clamp. |
 |
Slide
the seat pillar and sissy bars out of the frame. |
 |
If
the seat pillar or sissy bars are rusted in and won't move you
will need to remove the seat following these steps.
A shaft goes through the back of the seat and is bolted to lugs
on the sissy bars. |
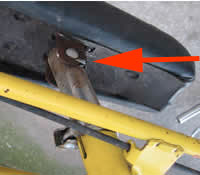 |
The
front is rivetted to the top of the seat tube. |
 |
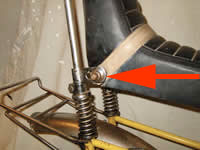
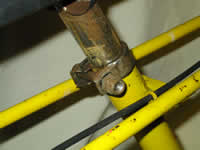
Remove
the DOMED NUT on one side.
Save it!! Give it a good clean with wire wool and metal polish. |
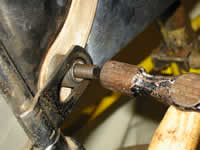 |
The
shaft may be rusted onto the metal seat backplate. Give it a
good squirt with WD40 and TAP it to loosen it. Don't bash it!
-this will damage the thread. If it is badly rusted find another
nut to fit and bash that. You should then be able to pull the
shaft through from the other side. |
 |
This
is the seat backplate. The bottom is curved round to make an
open tube to hold the shaft. If the shaft is difficult to move
squirt WD40 along the gap. As a last resort the plate may have
to be prised open. |
 |
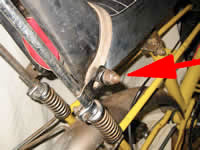
Release
the clamp holding the seat tube in place. The seat tube should
slide out of the frame and the rear of the seat prised away
from the sissy bar lugs. |
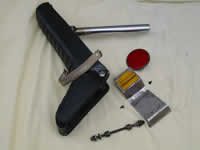 |
These
are the parts you have removed. GET CLEANING. Click the image
for a closer look |
| When
the seat is cleaned up and reassembled mount it on the sissy
bars and slot the complete assembly into the frame. This is
a lot easier than trying to squeeze the seat between the sissy
bars once they are on the frame. |